We're going to ask you a couple of questions to help you get started with your Scarlett as quickly as possible.
Do you use a Mac or Windows computer?
What software do you want to use with your Scarlett?
Ableton or Pro Tools?
Your Scarlett comes bundled with Ableton Live and Pro Tools. The video below explains what they do and the differences between the two pieces of software.
Once you've watched the video, let us know which one you would like to use.
Driver installation
In order to use your Scarlett with Windows, you'll need to install our USB driver. The video below shows how to install it:
Ableton Live Lite
The video below shows how to install and register Ableton Live Lite:
Pro Tools First
The video below shows how to install and register Pro Tools First:
FL Studio
The steps below will guide you through how to set up your Scarlett with FL Studio:
-
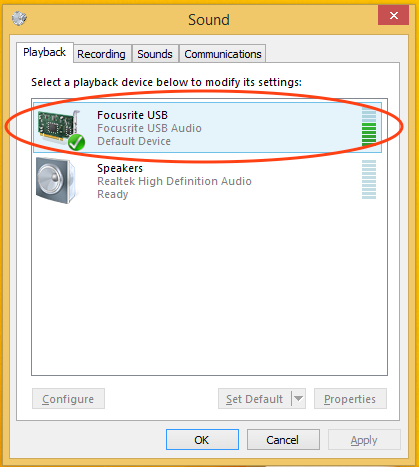
Once you have installed the driver go to your computer's 'Control Panel' > 'Sound' option. In the 'Playback' and 'Recording' tabs, make sure the Focusrite/Scarlett option is selected as the default device. If it isn't already, right click it and select 'Set as Default Device'.
-
Now, open FL Studio. Open the 'Options' menu, go to 'Audio Settings' and set the device to 'Focusrite USB ASIO'. You'll also need to set 'Playback tracking' to either 'Hybrid' or 'Mixer'.
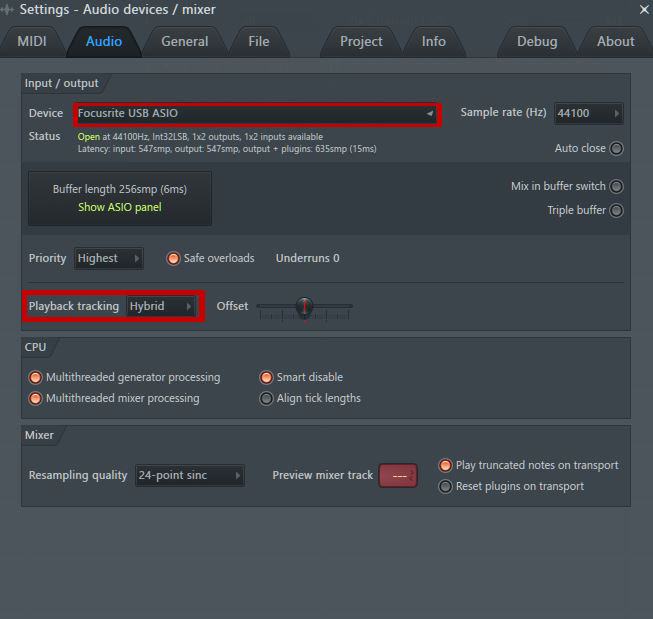
You can change the buffer size from the ASIO Control Panel, which you can open by clicking 'Show ASIO Panel'.
-
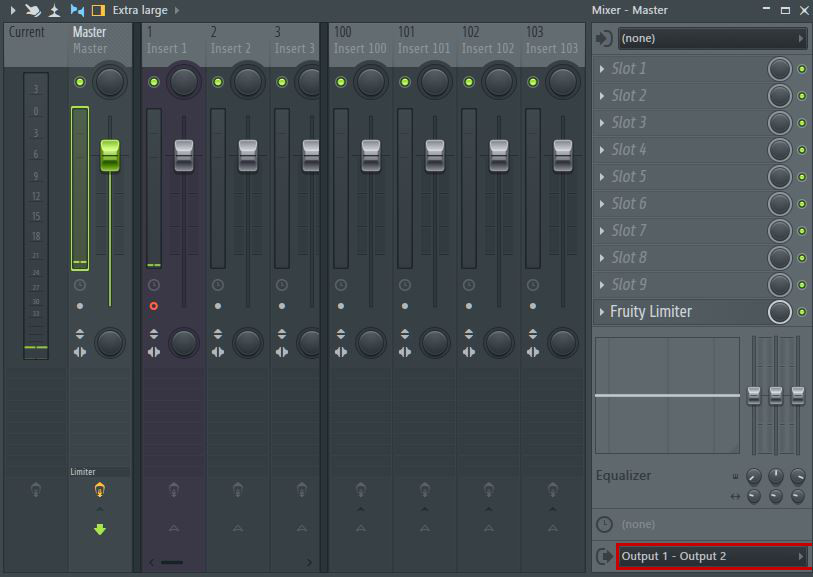
Go to the mixer window ('View' > 'Mixer') and click on the master channel. Make sure the output is set to Focusrite (in this case we are using Output 1 and 2).
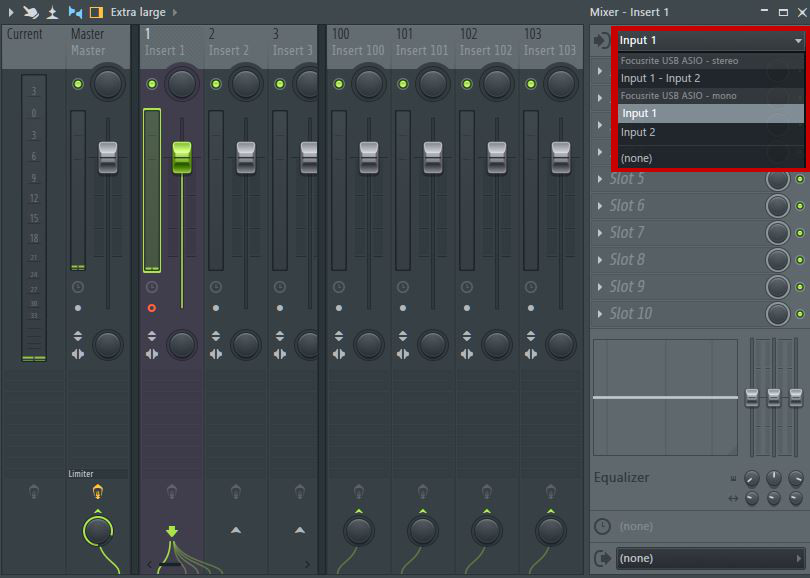
To get input from a microphone, go to an insert channel and select the input as the appropriate input:
-
With these settings you can then press Record and Play to record your audio which will appear as a waveform once recorded:

You can then export this by going to 'File' > 'Export' and selecting the desired format (we would recommend WAV unless you have a reason to choose something else). From here you'll be asked to choose a name for the file as well as it's location. This will then bring up the rendering window where you can choose what you are exporting and other details:
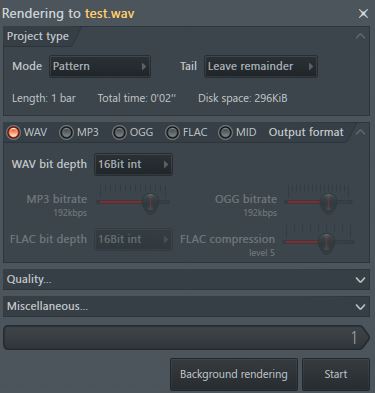
When you are happy with the settings hit start to render.
Logic
As you're using a Mac, you don't need to install a driver. The steps below will guide you through how to set up your Scarlett with Logic:
-
Connect your Scarlett to your Mac's USB port using the supplied cable and open up Logic Pro X.
-
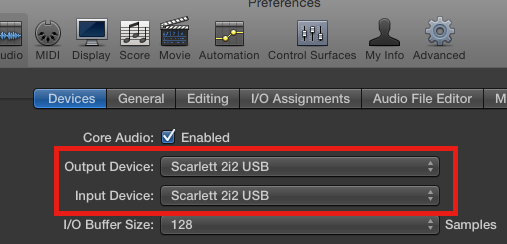
Open a new or existing project and navigate to 'Logic Pro X' > 'Preferences' > 'Audio'.
-
Set the Scarlett as both the input and output device:
-
Create a new audio track by going to the 'Track' tab (across the top of the screen) > 'Insert new audio track'. This will place a new mono audio track into the project.
-
If you have your microphone, guitar, bass etc connected to input 1 of the Scarlett, ensure the track is set to record of input 1. If connected to input 2, change the track in Logic to input 2:

-
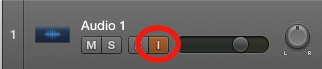
To listen to your incoming audio - turn on 'Input Monitoring' on the track by clicking 'I':
-
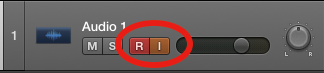
To record onto the track, 'record enable' the track by clicking 'R':
-
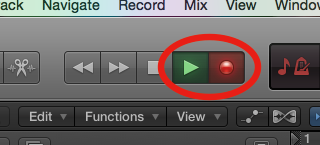
Ensure the gain dial for the input you are connected to on the Scarlett is turned up so that the light around the gain dial lights up green when you play your guitar/speak into the microphone. You can now start the project recording by clicking the Record button:
Get Started
We currently have getting started material for Ableton Live and Pro Tools on Mac and Windows, Logic on Mac and FL Studio on Windows but we'll look to create some for you in future. In the mean-time, you can find all of our Scarlett getting started videos here.
You can also use the widget in the bottom right hand corner of this page to search our help centre and chat with us (Live chat is available between 7:30am and 1am GMT Monday to Thursday (11:30pm to 6pm Pacific time) and 1pm to 1am GMT on Fridays (5am to 6pm Pacific time)).
What next?
Now your Scarlett's set up, you're ready to start making music. You can find more tutorials on using your DAW on our help centre here.
Is your Scarlett now working with your DAW?
Was this interactive getting started guide useful?
What could have improved the getting started process?
What is you email address?
Collecting email address infromation allows us to personalise users’ online experience with our sites and services, analyse trends, track users’ movements around the Sites and to gather demographic information about our user base – for more details see our terms and conditions.
Can we contact you about your responses?
Please note, if you require technical support, the best way to contact our support team is via our website here
Thank you!
Thanks for completing our survey. You can find more tutorials on using on our help centre here.
If you need more help getting started, you can contact our support team here.